Working with the linux terminal can be tricky, tiresome and troubling.
Working with the Linux terminal can be tricky, tiresome and troubling especially when you don’t know the basic and most important commands and hacks.
Some very complex tasks that can take you minutes to initiate in Linux can be achieved by using very simple commands that you can master easily.
In this article, I am going to show you Linux commands and tricks that will save you a lot of time and pain.
lINUX TERMINAL TRICKS AND COMMANDS FOR HIGHER PRODUCTIVITY.
You might find some of these commands and tricks familiar, But I am sure if you are a pro, you won’t miss out one or more commands to learn.
Don’t forget to drop your favorite tricks in the comment section.
0. pwd
This command displays your current working directory as in where you have navigated to.

1. su.
It is used to switch to the root user. In linux the root user, is a user who has the highest privileges by default. You will use this command when you need to perform tasks that require root privileges.

2 su <username>
This command, switches to a different user, passed as the argument <username>.

3.clear.
This command clears the terminal screen.
The key combination Ctrl + L also clears the screen.
4. cp.
Copies files and directories(folders) from one location to the specified destination.
Syntax.
Cp <flags> <source> <destination>
 In the above example the file “test” is being copied to the destination folder “test_folder”. No flags are issued.
The following are some special flags associated with the cp command that will be handy sometimes.
cp -i <source> <destination>…The <i> flag copies files interactively to the destination folder. It will prompt you before overwriting the file in the destination folder if it exists.

cp -n <source> <destination> …When this flag n is issued the destination folder is not overwritten.
cp -V <source> <destination> …This flag -v means verbose, when this flag is issued the cp command tries to explain what is being done.

cp -u <source> <destination> …This flag copies files only if the source file is newer than the destination file, or when the destination file is missing.(u means update.)
The above flags are the most commonly used, to see a full list of the flags run the following command man cp.
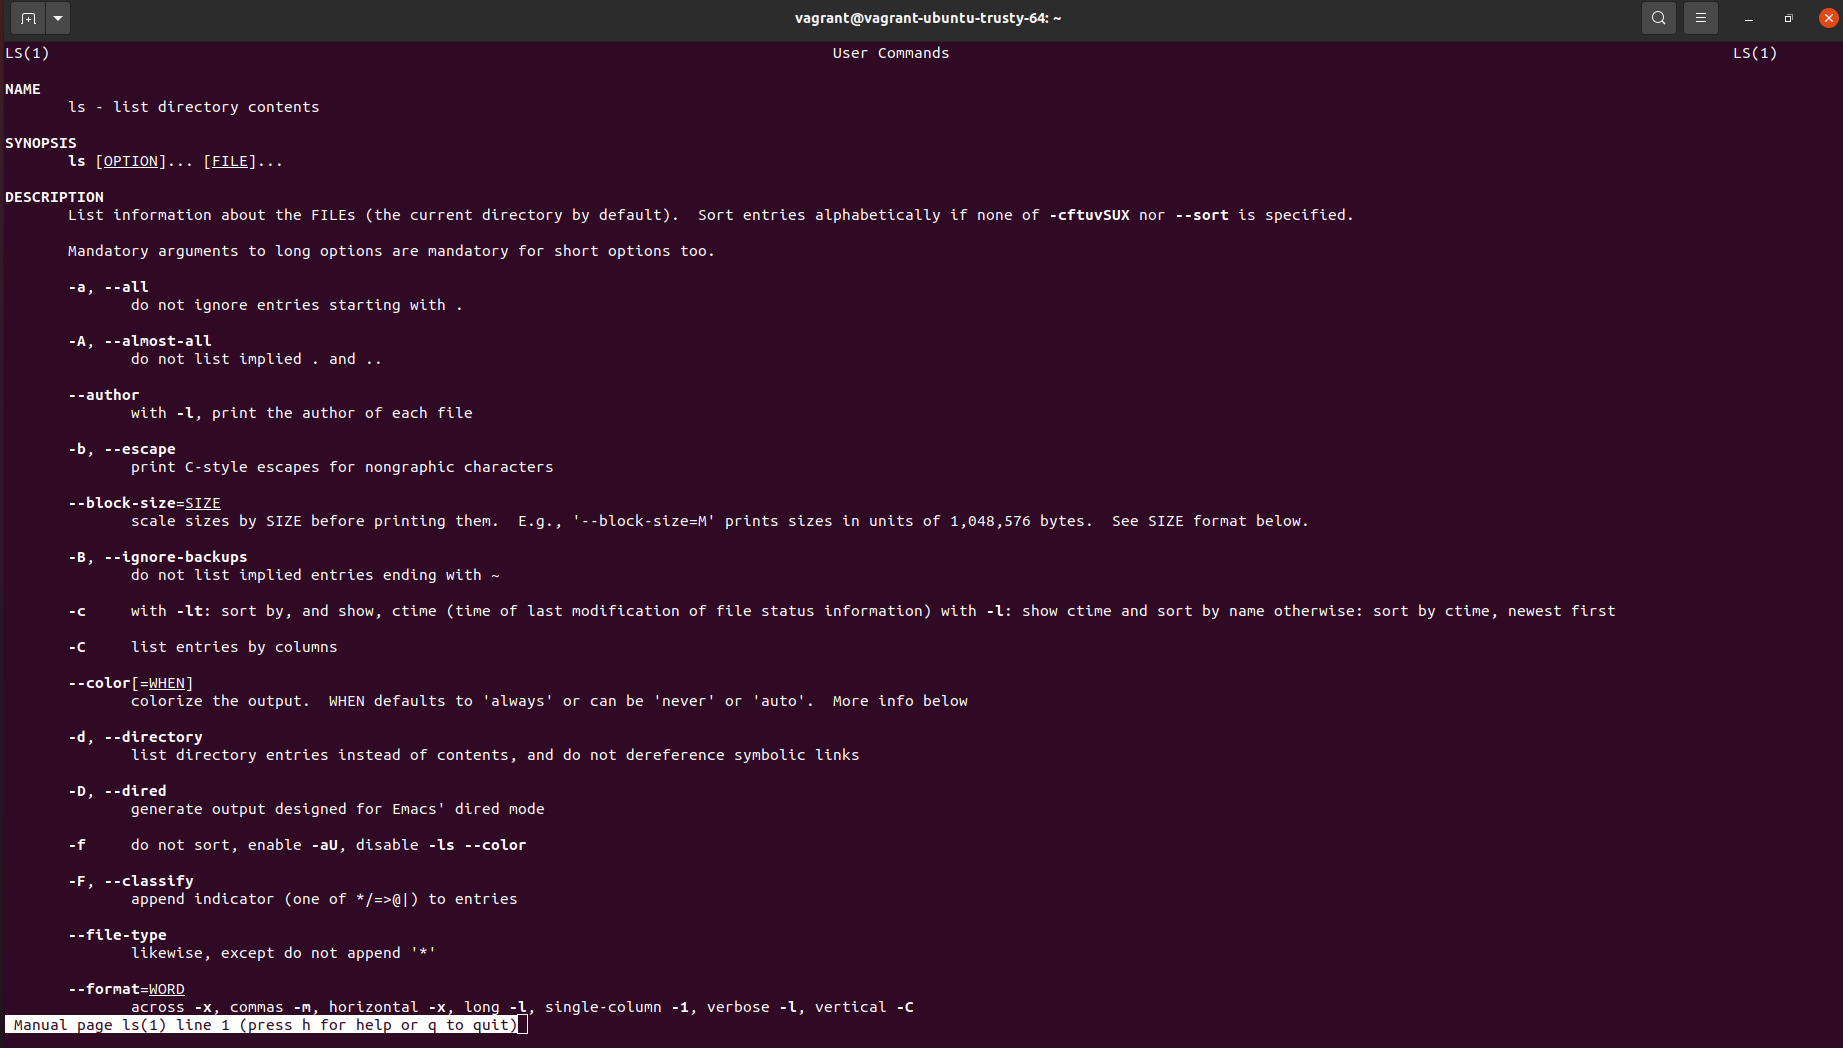
5.ls
This command lists the contents of a directory.
Syntax.
ls <flag> [file]
both flag and file in the most basic case are optional.
The following are some commonly used flags with this command.
ls -a …Lists all the directory contents including those files whose names start with a (.) eg “.test”

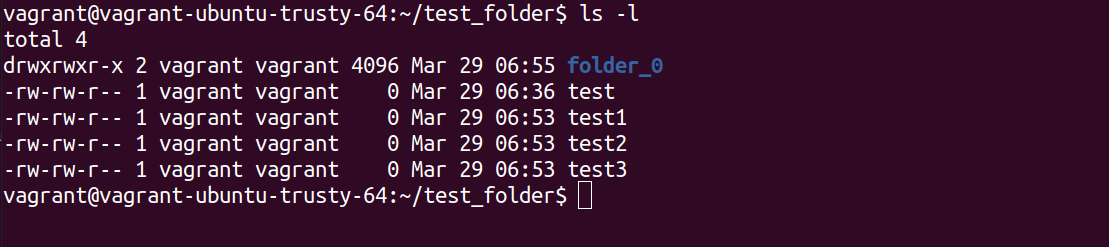
ls -l …Prints contents in a long listing format.
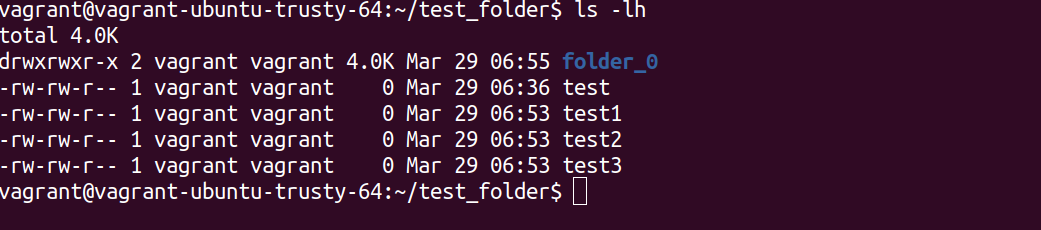
 ls -lh ….Prints directory contents in long listing format while showing the sizes in human readable form. Notice how the 4096 Bytes from the previous screen short are now displayed as 4KBs.
ls -1...Lists one file per line.(This is one<1> and not the later <i>).

ls -s … Sorts the directory contents by their sizes. Largest first.
To see a full list of the flags run the command man ls.
6.mkdir.
This command creates a directory(folder) or directories if they do not already exist.
Syntax.
mkdir <option> <directory name>
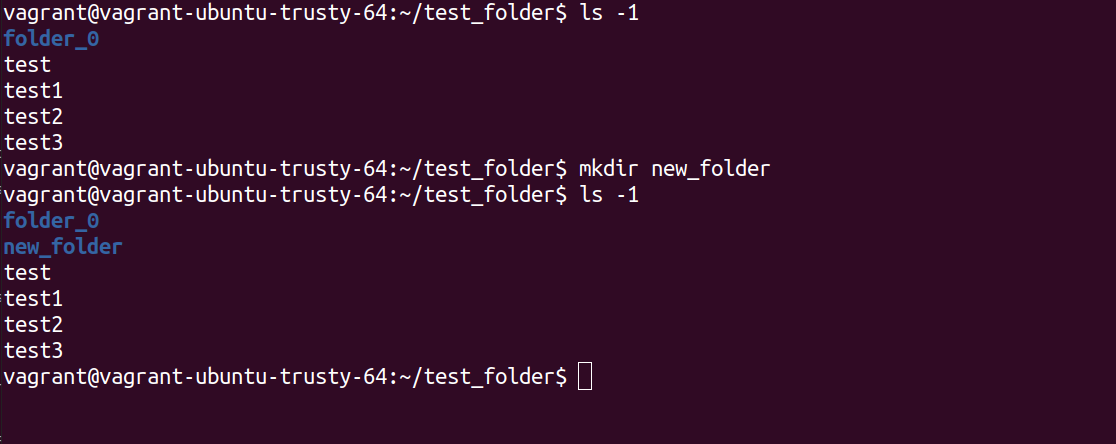
As you can see in the above screen Shot a new folder called “new_folder” has been created.
7. rmdir.
Deletes an empty directory.
Syntax rmdir <directory name>.

8. rm.
This command removes both files and directories.
By default it does not remove directories.
Syntax.
rm [option] [file].
Some flags(options) commonly used with this command are as follows:
-f … Ignores nonexistent files without prompting the user.
-i … Prompts the user before every removal.
-r … Remove directories and their contents recursively.
-d … Remove empty directories.
-v … Explain what is being done.
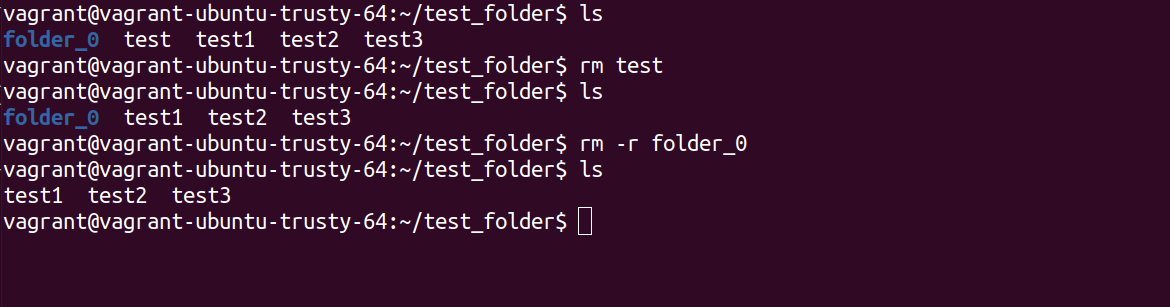
Notice that for rm to remove directories, the flag -r must be issued
9.cd
This command is used to navigate to a particular folder/directory.
Suppose you wanted to navigate to the Desktop folder, or any other folder, this is where the cd command comes into play.
Syntax:
cd [folder_name].
 In the above example we first check our current working directory using the command pwd.
We then use the command cd to navigate to the folder “new_folder” that is contained inside our current working directory.
For this command to be executed successfully, the folder that you want to “cd” into must be within the current working directory, otherwise you must provide the full path to the folder.
Take a look at the screen Shots below.

From the above screen Shot, the first attempt to cd into the var director fails! Why? Because var directory is not within our current working directory and therefore we must provide the full path to the var directory. When we use “cd /var” The forward stroke(/) before the name var tells cd to go to the root directory first then to the directory var, therefore cd is able to execute successfully.
Notice that in linux “/” represents the root directory, while “~” represents the home directory.
cd .. – When cd is used followed by two dots, then cd navigates back one directory as shown below.

In the above screen Shot we first print our current working directory using pwd, as you can see we are inside the folder new_folder. When we use the cd .. command we go back one directory, and now we are in the folder test_folder.
when cd is used with the flag (-) navigates to the previous directory.

In the above example we visited the directory var that is inside the root directory, we then used the command “cd -” to go back to the previous current working directory where we were.
10. chmod.
This command is used to change file and folder permissions.
Syntax.
Chmod <option> <mode> <file>
Briefly Permissions are divided into 3 categories.
- User permissions
- Group permissions
- Other Permissions.
Decimal number system Permissions representation.
- 1 represents execute permission(symbolically as “x”).
- 2 represents write permission.(symbolically as “w”).
- 4 Represents read permission.(symbolically as “r”).
Notice that permissions can be combined, eg permission value of 7 means that a user is able to read, write and execute a file. ie (1+2+4 = 7).
Conventionally permissions are represented in the following way.
[owner_permission:group_permission:others_permission]
so if a file has permission of 777. Means that the owner, the group and others are all able to read, write, and execute a file.
If a file has a permission of 642 means that the owner is able to read and write a file(4+2), a group is able to read only(4) while others are able to write only(2).

In the above example we try to execute the script test1 which we don’t have permission to, when we change the permission of the file to 777, meaning both owner, group and others have all the 3 permissions, and now we are able to execute the script.
A deeper look at linux file permissions
Permission Name |
character representation |
Number representation. |
READ |
r |
4 |
WRITE |
w |
2 |
EXECUTE |
x |
1 |
A hyphen – means no permission.
Grouping permissions.
Permissions are always grouped into 3 categories.
Owner…Person who created the file
Group…Can contain multiple users.Therefore, all users in that group will have the same permissions. Makes it easier to manage permissions for several people instead of creating permissions for every user.
Others…Refers to anyone who is not the file owner and does not belong to any of the defined groups.
Example.
A file has the following permissions. rwxr-xr-x
Breaking this down gives us the following permissions. rwx r-x r-x
Notice that the first 3 permissions belong to the owner, next 3 to the group and the last 3 to others.
rwx r-x r-x, owner group and others respetively.
The decimal number representation of this permission will be 755.
We get the decimal number permissions by adding up the numbers representing each permission.
Therefore rwx = 4 + 2 + 1 = 7
r-x = 4 + 1 = 5
The file permission rwxr-xr-x can therefore be represented as 755 as well.
sudo chmod g-rxw sample
To add permissions use + sign
To remove permissions use – sign.
Example.
The following command removes all the 3 permissions from the group to a file called sample.
sudo chmod g-rxw sample
The following command adds the read and write permission to others to a file called sample.
sudo chmod o+rx sample
The following command adds all the 3 permissions to the owner of the file called sample.
sudo chmod u+rwx sample
We use g to represent the group, o to represent the others and u to represent the owner.
11. cat.
Syntax:
cat <file>
This command concatenates and prints files on the standard output. In simple terms ‘standard output’ refers to your computer screen or monitor.
In the below example cat prints the contents of the file test.txt to the standard output.

12. Find
This command is used to search for a file(or a folder) in a directory(folder).
It is one of the most frequently used commands.
In the most basic way, the following is the syntax for this command.
Find <folder to search from> -name <name of file>
In the following example, find looks for a file named “test.txt” in the current working directory, in linux (.) ie a single dot, refers to the current working directory.

For detailed information about find command run “man find” from your terminal.
13. whatis.
Syntax:
whatis <command name>
This command displays a very short description of the command issued(one line). Generally it tells you what a given command does. This should be your quick run-to command when your are stuck.

14. man.
Syntax:
man <command-name>
Shows the manual page for the specified command. It is the official documentation for a command.
15.exit
This command ends the current terminal session.
Simply run “exit” from your terminal.

16. ps
Reports a snapshot of the current running processes.
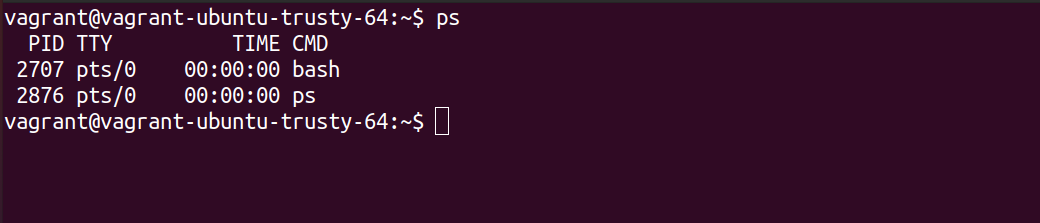
17. Kill
syntax: kill <process-id>
This command is used to send a signal to a running process. By default the signal sent is TERM. The terminate signal which terminates a running process.
From the previous screen Shot, running kill 2707 will kill the process with the id 2707.
18. top
It provides a dynamic and real time view of the running processes in a system

19. Shutdown
This command will shut down your computer.
With the -r option it restarts your computer,
ie shutdown -r
20.Run more than one command in a single command execution.
If you wanted to run several commands in sequence, one after another, what would you do? Definitely and professionally you should not wait for one command to finish then execute the next one.
This special operator “;” is used to run several commands in one line. The good thing about it is that, execution is in parallel, there is no need to wait for one command to finish executing before the next command is executed.
The following is the syntax.
Command1; command2; command3;.
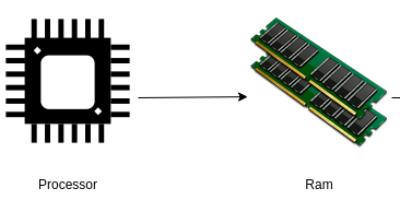
21. Check your PC architecture.
Use the following command to check if the architecture of your PC is 32 bit or 64 bit.
getconf LONG_BIT


This is very helpful. Thankyou.